How To: Create A Race Medal Display
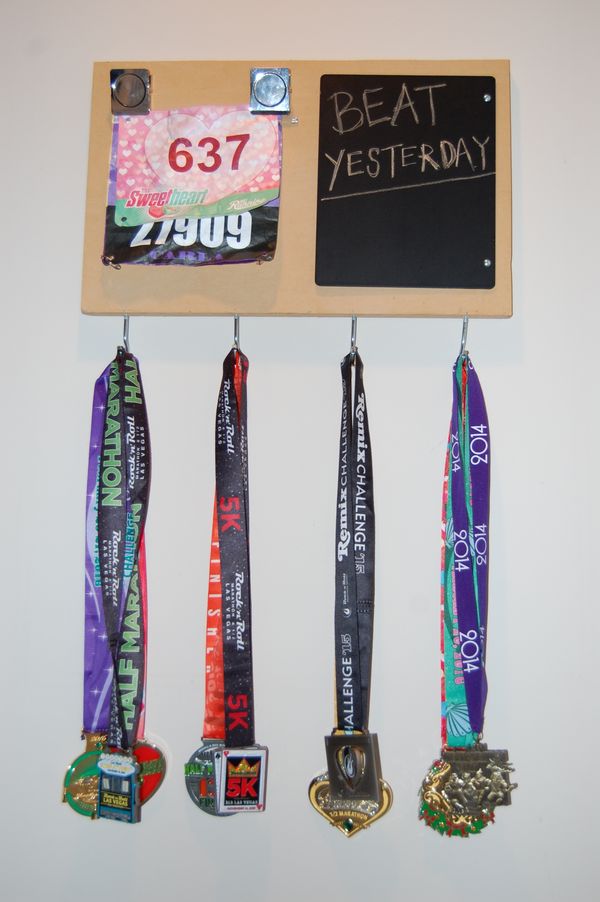
You’ve crossed the finish line. The race you’ve trained so hard for is now over. Along with feeling of self-pride and happiness, you receive a medal for finishing. The medal is that tangible symbol to represent your endurance. You’ve worked hard and trained for so long for that race! Despite your race time, you shouldn’t put your tangible symbol of endurance in a box. You should admire it and display it so it can inspire you to do more and #BeatYesterday. Here’s how to create a great medal display:
Step 1: Gather your materials. For this project you will need:
- a flat piece of wood or bulletin board (18 x 12 inches)
- chalkboard, paint, paint pens, or other decorating materials
- glue gun
- power drill
- knobs or hooks (4-6)
- 2 metal clips
My total expenses were $10.
Step 2: Cover the entire board with your choice of paint. I chose to attach a chalkboard so I can write in my goals, favorite quote, or current PR times.
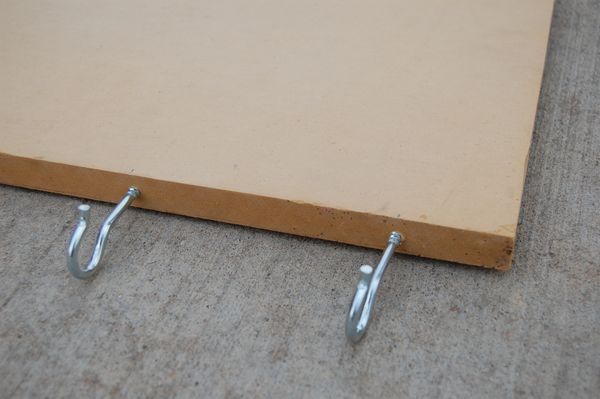
Step 3: After the paint has dried, or your chalkboard has been attached, drill the metal hooks across the bottom of the board. Depending on the size of your board, the number of hooks will vary. Place them about 2-4 inches apart.
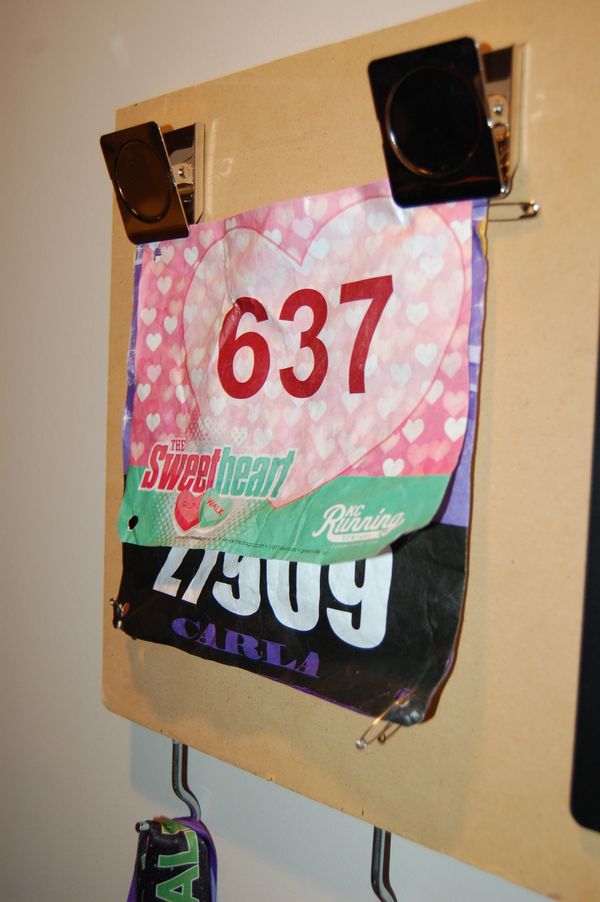
Step 4: Attach the metal clips with hot glue to the top of the board so you can easily hold your race bibs in place.
Step 5: Hang your finished display board in a place you will be able to see whenever you need some extra motivation to give you a push to keep going, and train harder.
The post How To: Create A Race Medal Display appeared first on Garmin Blog.
Sample Block Quote
Praesent vestibulum congue tellus at fringilla. Curabitur vitae semper sem, eu convallis est. Cras felis nunc commodo loremous convallis vitae interdum non nisl. Maecenas ac est sit amet augue pharetra convallis nec danos.
Sample Paragraph Text
Praesent vestibulum congue tellus at fringilla. Curabitur vitae semper sem, eu convallis est. Cras felis nunc commodo eu convallis vitae interdum non nisl. Maecenas ac est sit amet augue pharetra convallis nec danos dui.
Cras suscipit quam et turpis eleifend vitae malesuada magna congue. Damus id ullamcorper neque. Sed vitae mi a mi pretium aliquet ac sed elitos. Pellentesque nulla eros accumsan quis justo at tincidunt lobortis denimes loremous. Suspendisse vestibulum lectus in lectus volutpat, ut dapibus purus pulvinar. Vestibulum sit amet auctor ipsum.


